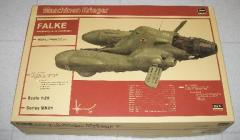
The Pkf. 85 Falke Antigravity Armored Raider is a design from the world of Maschinen Krieger as envisioned by Kow Yokoyama.
A companion kit is the Exclaimer Laser Gun, which features a large laser in place of the Vulcan cannon that is on the standard Falke, and another variant, the Griffon, is scheduled for release in July 2011.
I had never built an Ma.K kit at the time that I started work on this one, and I had a ball building it. I decided early on to stay away from any of the standard paint schemes, and decided instead to go with a paint scheme similar to those seen at NATO Tiger Meet annual events. But Im getting ahead of myself, so let me start at the beginning.
The kit is finely molded in light gray styrene for the main parts of the kit, and the figures were molded in tan styrene. I was surprised at how strong the styrene is. I used sprue nippers to separate the parts from the sprues, and then had to use an Xacto blade to trim off the remains of the sprue from each part. It was slow going, so I just took my time.
One drawback to the kit is that a stand isnt provided for displaying the completed model. I made my own using an old push-light (you know, the round, battery-powered lights that can be mounted inside closets, cabinets, showers . . . ) that is about 5 inches in diameter.
I received a great pointer from Barry Bar Murray on StarshipModeler.com. He suggested that I trim off the mounting tabs on the sides of the engine (part numbers C1 and C2) and use magnets to install the engine. This made it a lot easier when it was time to prime and paint the built model. I used super glue gel to install one magnet in the upper section of the engine, and one in the lower section, on the forward bulkhead. I installed corresponding magnets on the inside of the aft bulkhead (part D23), aft of the cockpit, and it worked almost perfectly. I did have to add in some styrene shims to get the engine to tilt properly.
The instructions start out by having the builder spend time working on the cockpit and the pilot, because once the upper and lower fuselage halves are joined, there is no way youll be able to get the pilot figure in and out of the cockpit. I spent about three hours on the cockpit and pilot, including weathering and applying the decals. The cockpit is the easy part. The pilot has 12 parts by himself, including an optional helmet rather than his face showing, not counting the second figure of a ground crew member. Just an FYI for you . . . the instruments on the cockpit panel are represented by individual decals rather than a single large panel. Step 1 covers construction of the cockpit tub, while the interior of the upper fuselage, which contains the instrument panel and the other cockpit items, is covered in Step 4. The assembly of the pilot isnt shown until Step 12, but the illustration in Step 1 shows him being placed into the cockpit tub.
I did deviate from the instructions in attaching parts D14 and C17 (upper hatch and interior) prior to installing the cockpit tub. The hatch hinge (part D7) and the mounting bucket (part D6) are installed in Step 4, but I wanted to make sure I had a good, tight bond between the tab on the hinge and the corresponding hole on the inside of the hatch. By attaching the hatch at this stage, I was able to hold the hinge in place while I pressed the hatch into position. I thought that trying to install the hatch later would be difficult once the pilot and the cockpit tub were installed.
The cockpit tub was painted primarily with Tamiya Field Gray, weathered with black and brown pastels, and dry-brushed with Model Master Chrome Silver. I used the same process for weathering the inside of the upper fuselage and the cockpit hatch.
I took my time and made sure all of the seams were sanded smooth. I didnt really have any major fit issues, just seams that took time to clean and sand flush. Building the kit was a lot easier than I thought it would have been, and I finished the actual building in about 10 hours, including the time spent on the cockpit. I also drilled a hole in the upper fuselage on the starboard side and added an antenna made of steel guitar string.
I primed the kit with Rust-o-Leum black sandable primer. Because I was going for a Tiger Meet paint scheme, I decided it would be easier to mask off the black sections for the stripes and airbrush on the remainder of the colors.
I assembled the 2.3cm Balkan four-barrel gun, but didnt attach it with glue to the mounting point. I wanted to be able to work on the paint scheme without having to worry about breaking the barrels. I was going to paint it black anyway, so the primer would suffice for the main color. I used the same primer for the engine color. I also didnt attach the wings (parts C11, C12, D24 and D25) to avoid breakage of the very small pins that hold them in place on the aft portions of the fuselage.
After the primer dried for a day, I airbrushed the model with a coat of Future to lock in the primer color, and then started masking with Tamiya masking tape. Once that was done, I started building up the colors for the tiger paint scheme. First was an underside coat of Tamiya Flat White with a bit of Sky Gray added. The next color was Tamiya Buff, followed by lightened Tamiya Flat Yellow, and finally a mixture of Tamiya Flat Yellow with Flat Red added to it to make it orange.
I let the paint dry for a day, then I removed the masking. I did have touch-ups to do on the black, which was done free-hand with a brush after I decanted some of the primer into a small plastic cup. Another coat of Future was airbrushed on prior to decal application, and then a final coat of Future to lock the decals in place. Once that was done, I weathered with black, brown, and white pastels, sealed with another coat of Future, then applied about three coats of Testors DullCote to tone done the shiny factor. The final weathering was done by dry-brushing with Chrome Silver.
The figures were painted with a mixture of Tamiya colors, with Flat Earth being the primary uniform color. I used Tamiya Brown to hand-paint the underlying shadows on the uniforms, then airbrushed on the Flat Earth. I misted on Tamiya Buff to highlight the raised portions of the clothes. The flesh tones were done using Model Master Acryl II Skin Tone Warm Tint, dry-brushed with Tamiya Flat Flesh, and then rubbed with flesh-tone pastels.
The completed kit is about 11.5 inches long, 9 inches across (from wingtip to wingtip) and is roughly 3.5 inches high.
This was a great kit, and I cant wait to get my hands on the Griffon!
Review by: Rich Lonewolf Dula
Entry created: February 23, 2011
|
 Visit website