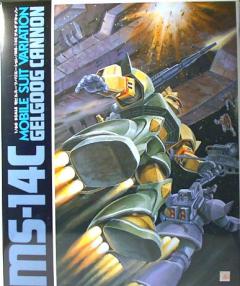
I picked this kit up during the post-Iron Modeler party at WonderFest 2008. It looked neat, and as I already have a 1:60 scale Gundam Exia in the stockpile, I thought Id better grab another larger-scale kit to display with it.
This kit was released in 1994, and according to HobbyLink Japan, this is a re-release of an earlier kit and is not up to current MG levels but builds into a very nice replica. Other Gundam M.S.V. kits that were released around the same time included the Zaku II High Mobility Type, Full Armor Gundam, and Zaku II (Johnny Ridden).
The box for this thing is huge (as would be expected, given the scale), and the parts were packed in tightly. Each sprue was individually bagged, so even the smaller parts were protected from being scattered around the box.
Overall I was kind of disappointed in the detail for the kit. The hands are the standard two halves with a hole in the middle to hold the weapon variety, which makes the kit look crummy when its complete. I would have thought that Bandai would have at least included some articulating fingers, or some decent fists.
This kit has a couple of great points as far as design and engineering. The kit includes a lighting system for the head sensor, and Bandai engineered the kit so that the battery pack fits into the torso. Now, the neat part is that the torso is attached to the hips by two clips. When you rotate the torso left or right 90 degrees, the torso lifts off the hips, providing access to the battery pack. Kudos to Bandai for this nice work. Its a lot better than trying to figure out how to rig up a switch somewhere.
On the other hand, this kit has some extremely crappy engineering. I had to add sheet styrene mounting tabs inside most of the body parts because Bandai either didnt include positioning pins at all, or only had one or two for the entire component (more about this later). This kit definitely takes some additional skill to build.
The first part that I built was the head, with the lighting system. The kit comes with an incandescent bulb and a sticker (to act as the sensor), and is powered by two AA batteries in a supplied battery pack. I loathe incandescent bulbs in models, so a quick trip to the local Radio Shack provided a 5 mm red LED bulb. Construction of the head was done as shown in the instructions.
I airbrushed the head unit and the torso section before joining the sections. Then I deviated from the instructions. Step 3 has you start construction on the arms. However, I decided that I wanted to have the Mech stand on its own two feet sooner rather than later, so I skipped ahead to Step 6 to work on the legs and feet. The feet went together without a problem, but in Step 7 I encountered the first of many fit issues.
The thighs (part numbers 22 & 23, and 24 & 25) lack any sort of positioning pins or tabs. I ended up having to cement small strips of styrene inside one half of the thigh, wait for it to dry, then join the thigh. Even then I had to do a large amount of sanding to make the adjoining surfaces even. I ended up having to do the same thing later with the forearms, the hips, the shoulder ball joints, and the shoulder armor bells.
The lower legs (parts 3 & 4 and 5 & 6) were also a pain in the backside. Bandai included two mounting pins, but neither one was part of the long flared section that runs down the back of the leg. I used more sheet styrene to provide mounting tabs to keep the sections aligned. The hips presented the same issue. Pins were provided where the upper hip sections attach to the waist plate, but the curved sections running down to the top of the thighs didnt have any mounting pins. More styrene was used here.
I was kind of put off by the design of the shoulders as well. When you assemble the shoulder balls in Step 5, you have to make sure that you allow space between the joint (part 70) and the mounting plate (part 28) when you glue in part 83. If you dont allow space, the shoulder armor bells (parts 16 & 17 and 18 & 19) wont fit. The halves slide into the tight space left between part 70 and 83. I recommend using one half of the shoulder bell as a spacing shim when youre gluing the shoulders together in this step.
The weapons went together easily and without any problems. The kit is equipped with a double-ended bladed pike, a handheld rifle, and an over-the-shoulder cannon mounted on a backpack. I decided against using the back-mounted carrying rack for the bladed pike. I placed the pike in the left hand, and permanently attached the blades to the pike. It was just easier to deal with it this way.
I was very disappointed by the lack of detail in the hands. The hands reminded me of some of the two-part fists included in the Bandai kits from the early 1980s. All you get in this kit for the fists are two halves, connected by a circular mounting sleeve for the wrist polycap to fit into. The halves included half-circle cutouts so you could mount the double-ended bladed pike. The hand holding the rifle was molded in three pieces two halves to wrap around the pistol grip, and a piece that looked like a figure-8 representing the ends of the pointer and middle finger, placed next to the trigger assembly. Bandai could have done so much more with the hands.
The colors used were in the mostly in the Tamiya acrylics line. I used XF-59 Desert Yellow and XF-65 Field Grey. The backpack was airbrushed with XF-63 German Grey. The weapons were airbrushed with X-10 Gun Metal, and detailed with Model Master Chrome Silver.
I airbrushed a coat of Future over the entire kit, and let it cure for 24 hours. Decal application was completed, and then I sealed the kit with another application of Future. Weathering was done with pastels and dry-brushing with Model Master Chrome silver, and after masking off the sensor area with Silly Putty, the kit was sealed with Testors DullCote.
The completed kit stands over 12 inches tall and looks quite impressive sitting on one of my display shelves. Despite the fit issues and the lack of detail, it was still an enjoyable kit to build.
Review by: Rich Lonewolf Dula
Entry created: January 2, 2012

Completed model by Rich "Lonewolf" Dula
 Visit website